Gel Nails vs Acrylic (Which One is Better?)
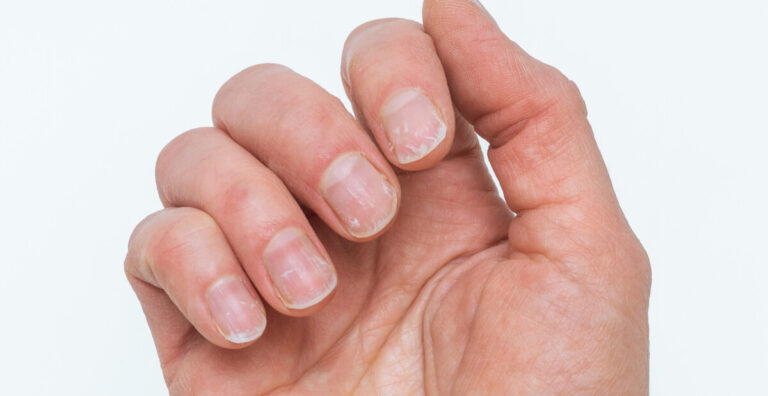
When deciding on your next manicure, are you having trouble deciding between Gel Nails vs Acrylic. Since both gel and acrylic nails are popular in today’s cosmetic industry, many ladies looking for fashionable nails frequently wonder which is better. However, how can you determine which one best fits your fashion tastes, nail type, and way of life?
Knowing the distinctions between these two nail systems Gel Nails vs Acrylic will enable you to make more informed choices about your appearance. Both types have special benefits, whether you desire strong, long-lasting extensions or nails that seem natural.
What Are Gel Nails?
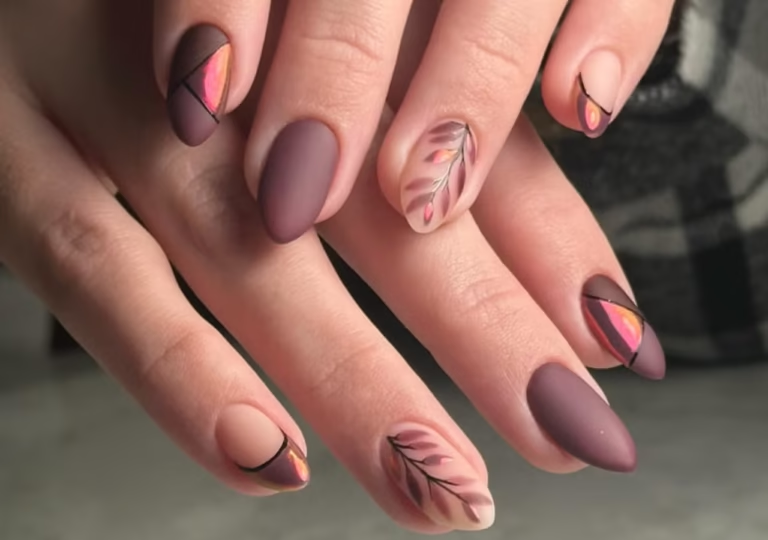
Gel nails have emerged as a favorite manicure option due to their natural look and stunning glossy finish. If you like nails that appear sleek and fashionable but prefer not to invest too much time in upkeep, gel nails can be a great option. They dry rapidly under a UV or LED lamp and remain flexible on the nails, ensuring comfort for daily use.
Numerous women appreciate gel nails for their perfect compatibility with contemporary fashion trends such as Spring Nails Ideas (Vibrant & Colorful Styles). Gentle pastel tones, floral designs, and shiny light finishes appear particularly vivid when used with gel polish. The sleek texture and enduring gloss make gel nails a popular option for individuals who appreciate trendy seasonal looks.
How Are Gel Nails Applied?
Achieving a salon-quality gel manicure at home is now simpler than before. Armed with the proper tools and some patience, anyone can master the procedure. This guide simplifies the application process into clear steps, enabling beginners to learn how to prep the nail, apply gel polish, and cure it correctly.
Whether you’re playing with vibrant seasonal looks or exploring Cute Nails for Short Nails (Simple & Fashionable Concepts), gel polish serves as an ideal foundation for neat and chic designs.
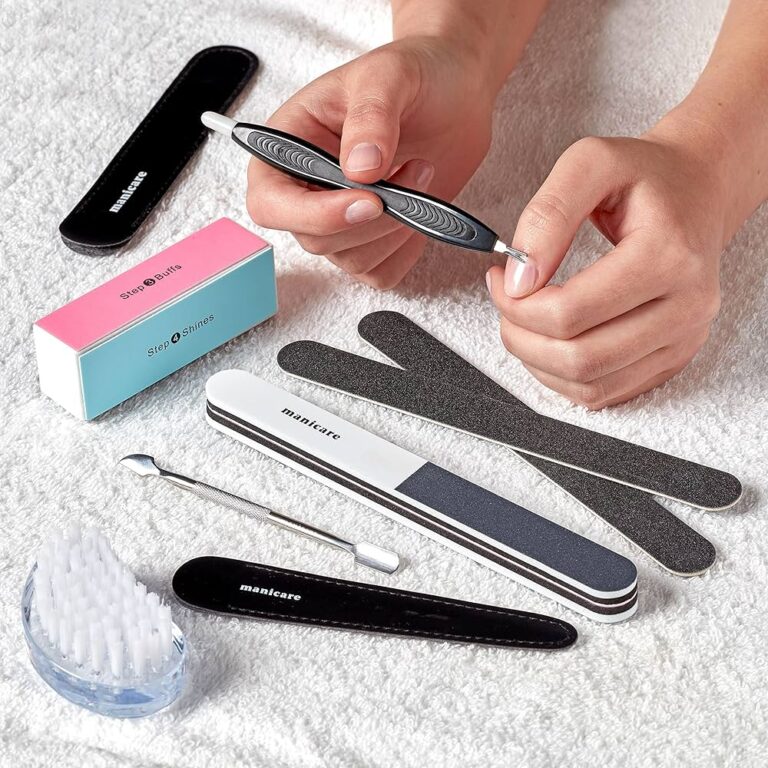
Step 1: Preparing the Natural Nail
The initial phase starts with adequate nail readiness. Begin by filing your nails with a nail file to even out rough edges and achieve the nail shape you want. Numerous individuals favor shorter forms for ease, particularly when designing adorable and fashionable styles on short nails.
Once shaped, softly buff the surface of every nail. This eliminates the natural gloss and produces a somewhat coarse surface, allowing the gel polish to stick more effectively. After buffing, use a nail cleanser or an alcohol wipe to clean the nail, eliminating dust, oil, or residue.
This preparatory phase is crucial as it ensures the manicure endures for a more extended period and avoids lifting.
Step 2: Applying the Base Coat
Once the nails are ready, the subsequent step involves applying the gel base coat. Spread a fine and uniform coat over each nail, ensuring the polish stays away from the cuticle region.
The base coat serves as a shield for the natural nail and creates a base for the subsequent color layers. After application, cure the base coat under a UV or LED lamp for approximately 30 to 60 seconds until it is completely hardened.
A well-cured base coat guarantees that the manicure remains sleek and long-lasting.
Step 3: Adding the Color Layers
Now arrives the thrilling section — adding color. Select the color that matches your feelings or the time of year. Soft pinks, mint greens, and lavender shades are ideal for Spring Nail Ideas (Fresh & Colorful Designs), providing your nails with a vibrant and rejuvenating appearance.
Use the initial light layer of gel polish and cure it beneath the lamp. Next, apply an additional thin layer if you desire more intense color saturation. Every coat must be cured prior to applying the subsequent one to guarantee the polish hardens correctly and endures for a longer duration.
Thin layers are crucial since thick layers might not dry uniformly.
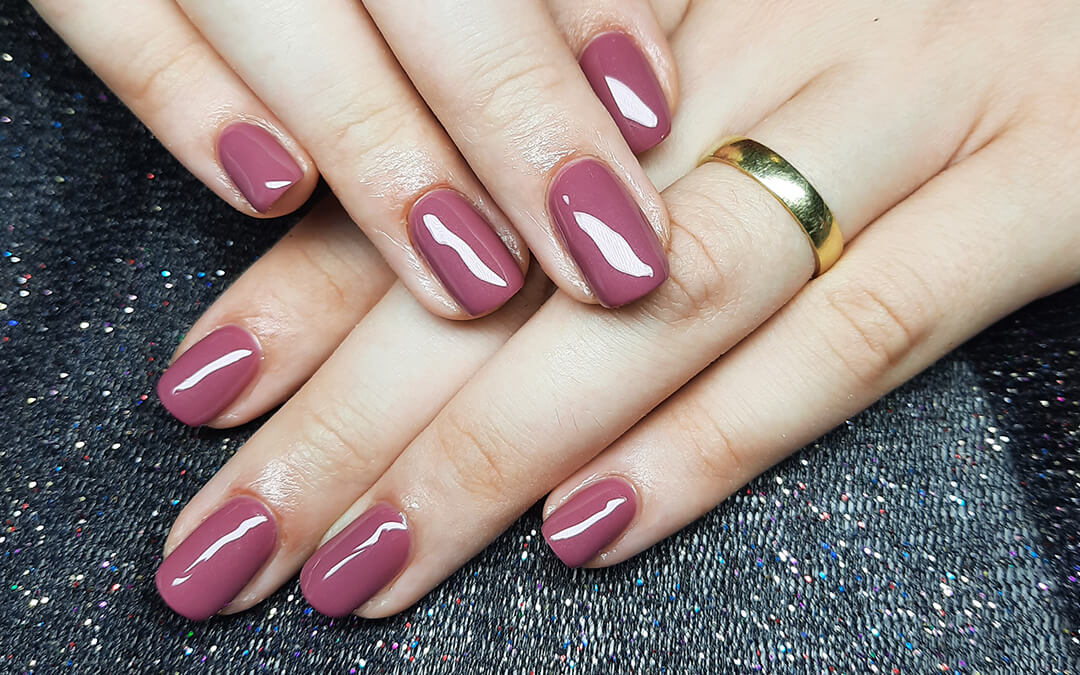
Step 4: Sealing with a Top Coat
The final step is sealing the manicure with a gel top coat. This layer locks in the color and creates the signature glossy shine that gel nails are known for.
Apply a thin coat evenly across each nail and cure it under the lamp for the recommended time. After curing, the nails will appear smooth, shiny, and completely set.
At this stage, your manicure is ready to go, and you can enjoy strong, beautiful nails that complement both everyday outfits and stylish nail trends.
How Long Do Gel Nails Last?
A major benefit of gel nails is their long-lasting nature. A standard gel manicure can endure for two to three weeks, based on your nail growth and how well you maintain them.
In comparison to standard nail polish, gel manicures offer significantly greater durability against chipping and peeling. This is the reason they are favored by those seeking durable nails without the need for regular maintenance.
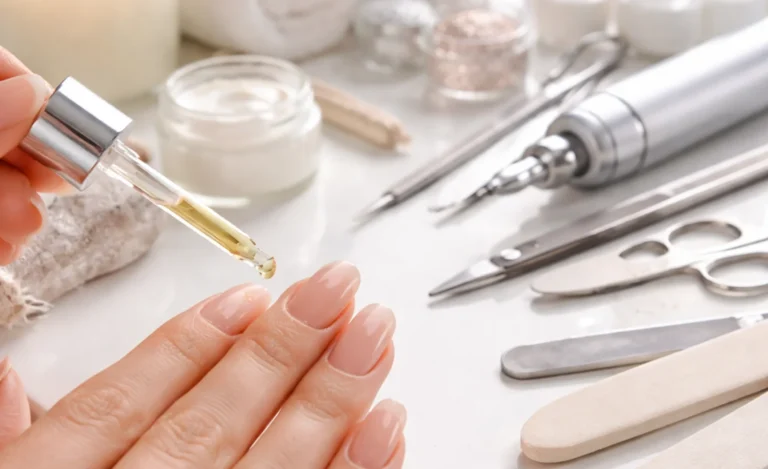
To maintain the freshness of your gel manicure, it’s advisable to use cuticle oil every day and hydrate your hands with hand cream. Well-nourished nails and moisturized cuticles contribute to prolonging the duration of the manicure.
Why Are Gel Nails Perfect for Short Nail Styles?
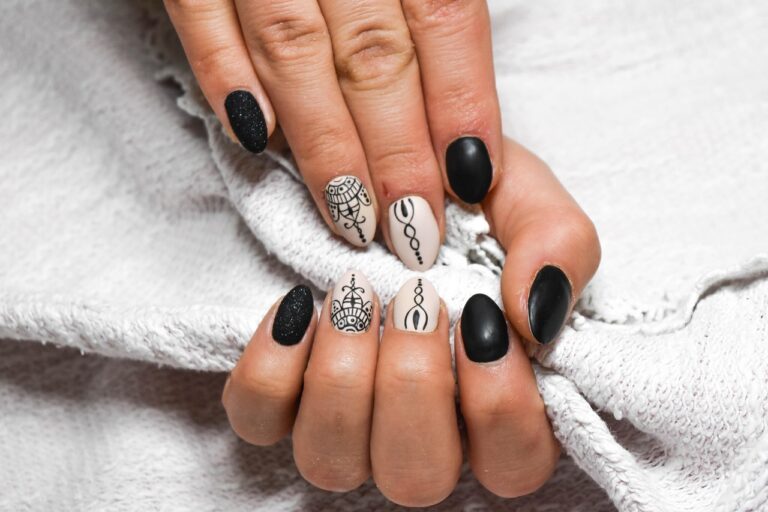
Numerous individuals think that stunning nail art demands lengthy nails, but this is not necessarily accurate. Gel polish is highly effective on shorter nail shapes and is frequently chosen for Cute Nails for Short Nails (Simple & Stylish Concepts).
Short gel nails can appear very fashionable when paired with simple designs such as small hearts, pastel tips, or subtle dots. These styles are simple to care for and ideal for regular use.
How Do You Remove Gel Nails?
Taking off gel nails must always be done cautiously to prevent harming the natural nail. The most secure approach is to immerse them in acetone.
Begin by softly filing the glossy upper layer of the gel polish. Soak cotton pads in acetone, apply them to the nails, and encase each finger with foil. Keep them covered for 10 to 15 minutes.
Once soaked, the gel will become pliable and can be gently removed with an orangewood stick or cuticle pusher. Avoid peeling or forcibly removing the gel, as it may compromise the strength of your natural nails.
After taking off the gel, apply oil to your nails and cuticles to rehydrate them.
Why Do So Many People Choose Gel Nails?
Gel nails have become a favorite manicure option because they combine beauty, durability, and comfort. They offer a natural look with a glossy finish and require less maintenance compared to traditional polish.
They also support a wide variety of nail designs, from simple everyday manicures to colorful seasonal styles like Spring Nails Ideas or trendy short nail art.
Whether you enjoy minimal nail aesthetics or creative nail designs, gel nails provide a flexible base that adapts to your personal style.
What Are Acrylic Nails?
For striking length or eye-catching shapes, acrylic nails could be your preferred choice. They have existed for many years and are recognized for their durability and artistic potential. We suggest that a professional carry out this procedure, as it is somewhat more complex than the gel nail method and requires additional skill to execute properly.
How are acrylic nails applied?
Acrylic nails provide limitless styling options, delivering that desired salon-quality look. However, to achieve optimal results, it’s beneficial to understand precisely what your nail technician is performing at each phase of the procedure. This comprehensive guide will dissect the acrylic nail application process from preparation to finishing touches, emphasizing important aspects and useful advice to ensure you are well-informed, at ease, and prepared to flaunt stunning, enduring nails.
Step 1: Formulating the acrylic blend
A nail technician begins by combining a liquid monomer with a powder polymer. When mixed together, these two products create a dense, shapeable paste. This paste serves as the foundation for your acrylic nails.
Step 2: Applying the acrylic paste
The technician will utilize a brush to coat your natural nail or a nail extension tip with the acrylic paste. They mold the dough into the preferred form, be it a square, almond, coffin, or stiletto. The paste starts to solidify almost right away when it comes into contact with air.
Step 3: Molding and polishing
After the acrylic has completely cured, it’s time to mold. The nail is shaped by filing to create a smooth surface, and afterward, it’s buffed to eliminate any irregular texture.
Step 4: Painting and finishing
Ultimately, the nails are coated with either standard nail polish or gel polish, based on the preferred appearance and durability. A topcoat is commonly applied for enhanced shine and safeguarding, locking in the color and providing the nails with a finished look.
How long do acrylic nails last?
With proper maintenance, acrylic nails may endure up to three weeks or occasionally more. However, as your natural nails grow, you will probably notice a space close to the cuticle. To maintain a fresh appearance and avoid lifting or breakage, scheduling a fill every two to three weeks is advisable. While performing a fill, your technician will smooth out the existing acrylic and apply new material to integrate everything smoothly.
How do you remove acrylics?
Similar to gels, acrylic nails need to be soaked in acetone for their removal. This procedure may take approximately 20 to 30 minutes and can involve carefully filing the surface layer to assist the acetone in penetrating. It’s advisable to have them professionally taken out to avoid harm.
Key Differences
Gel Nails vs. Acrylic: What’s the Difference?
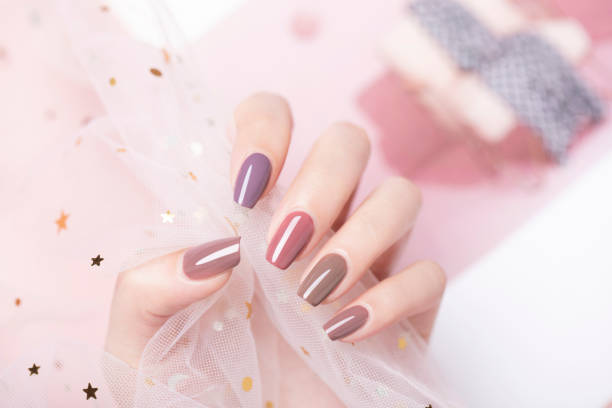
If you’re conflicted about gel versus acrylic nails, it ultimately depends on their appearance, texture, and durability. Every type has its distinct feel: gel nails provide a shiny, natural look, whereas acrylics are robust, vibrant, and adaptable. Understanding these distinctions simplifies the process of choosing what aligns with your preferences and habits.
- Look and finish
Gel nails possess a sleek, shiny appearance that appears very natural, resembling your own nails but enhanced. They are also adaptable, which makes them feel somewhat lighter and more enjoyable. Acrylic nails, on the other hand, are sturdier and can be shaped into longer, bolder forms, ideal for those seeking drama. Keep in mind that if they aren’t blended properly, they may occasionally appear less natural.
- Health and safety
Gel and acrylic nails are completely safe when applied and removed properly, though there are some distinctions to remember. Gel is generally milder and requires less filing. Acrylic nails involve more potent chemicals and require additional shaping, which may weaken your natural nails over time if you’re not cautious or take extended breaks.
- Cost
If you’re curious about the price of acrylic nails, it’s important to understand that both gel and acrylic nails typically range from $30 to $70 for a standard set, but the ultimate cost varies significantly based on your location and the salon you choose. If you’re opting for additional services, such as nail art, lengthy extensions, or gel polish applied over acrylics, you could end up spending between $50 and $100.
Acrylics may seem pricier initially, but they could ultimately save you money over time as you can refill them instead of beginning anew. Fills typically range from $20 to $40 and assist in prolonging the lifespan of your set. With gel nails, you’ll probably require a complete redo every few weeks to maintain their fresh appearance.
Are you wondering how to clearly compare the two options?
While acrylic nails give strength and durability, gel nails offer flexibility and a natural appearance.
Gel nails are more comfortable to wear every day because they feel softer and lighter. Conversely, acrylic nails are more durable and appropriate for longer nail designs.
Gel nails are more comfortable to wear every day because they feel softer and lighter. Conversely, acrylic nails are more durable and appropriate for longer nail designs.
This crucial distinction aids in determining which choice might be most suitable for your requirements.
Which One Should You Choose?
Before attempting more complicated styles, novices in the nail industry sometimes look through Simple Nail Designs for Beginners which are easy Ideas. Simple nail art, such as dots, lines, or simplistic motifs, works well on both gel and artificial nails.
Do you like flexible, natural-looking nails? In that case, gel nails can be the best option.
However, acrylic nails might be a better choice if you want strong nails that can support long shapes or striking nail art.
Your lifestyle, personal style, and maintenance preferences will ultimately determine the choice. Seasonal patterns are also important. For Fall Nails Ideas 2026, Cozy & Trendy Looks, many stylists suggest warm hues and cozy textures, which go well with both gel and acrylic nails.
Conclusion
When comparing Gel Nails and Acrylic, which one genuinely emerges as the superior choice? The response ultimately relies on your individual tastes, way of life, and the kind of nail design you wish to accomplish. Both nail systems provide distinct benefits that contribute to their popularity in the contemporary beauty and fashion industry.
Gel nails are appreciated for their lifelike look, adaptability, and shiny finish. They are lightweight and comfortable, making them perfect for daily use. If you appreciate delicate, refined manicures or fashionable looks such as Spring Nails Ideas and Cute Nails for Short Nails gel nails can offer a sleek and attractive foundation.
Conversely, acrylic nails are recognized for their robustness, longevity, and adaptability. They are ideal for individuals who favor elongated nail shapes, striking designs, or vibrant nail artistry. Acrylics can maintain their shape for weeks and are particularly beneficial for crafting artistic designs and extensions.
Both choices can endure for several weeks with appropriate care and upkeep, and both can accommodate a diverse range of nail trends from basic everyday styles to seasonal designs like warm fall appearances or vibrant spring nails.
Ultimately, the true solution to Gel Nails vs Acrylic depends on what fits your needs best. For a natural sensation and flexible nails, gel could be the ideal option. Acrylics may be the superior choice if you want stronger nails capable of supporting longer shapes and creative designs. Grasping the distinctions between the two will enable you to select the manicure that aligns with your individual style and beauty regimen.
Gel vs Acrylic Nails: The Choice That Changed My Nail Game
Before you leave, allow me to relate a brief tale.
During my initial visit to a nail salon, I encountered the same inquiry that everyone poses: gel or acrylic? I selected gel nails since I desired a natural look. Eventually, I tried acrylic nails and found it enjoyable to explore daring nail designs. That experience taught me something valuable: beauty involves exploring and uncovering what boosts your confidence.
So why not experiment with both and determine which one fits you better? Your ideal manicure could be ready for you to try out.